Switching NBN providers in Australia is usually painless. Most of the time you don’t lose service, you don’t need a new modem, and the whole thing takes under ten minutes of your time. The hardest part is choosing what to switch to, and that’s mostly because there are over 100 NBN resellers in the market right now, with very different prices for the same NBN Co line into your house.
This is the practical guide. What happens, in what order, how long it takes, and where the pitfalls are. If you just want plan recommendations, jump to the live affiliate table further down. It pulls the cheapest unlimited plans straight from the database.
The short version
| Step | What you do | How long |
|---|---|---|
| 1. Check your contract | Look up exit fees, equipment ownership, contract end date | 5 min |
| 2. Pick a new plan | Browse the live table further down or our comparison page | 10 min |
| 3. Sign up with the new provider | Address, ID, payment details, connection type | 5 min |
| 4. Wait for the switch | New provider talks to NBN Co. You stay connected. | 1–7 days |
| 5. Cancel the old service | Many old providers cancel automatically. Some need a call. | 0–10 min |
| 6. Set up new equipment | If the new plan comes with a modem, plug it in. If BYO, follow our setup guide. | 15 min |
| 7. Test and review | Run a speed test, check the first bill | 5 min |
The rest of this guide expands on each step and covers the edge cases. What if you’re under contract, what if you’re moving house, what happens to your email address, and what to do if it all goes wrong.
Why switch in the first place?
The most common reasons Australians switch NBN providers in 2026:
- The intro pricing ran out. Most NBN plans have a 6-month intro price that bumps up by $10–$20/month after the discount window. People often realise this when looking at their bill and the new full-price number.
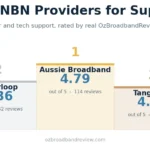
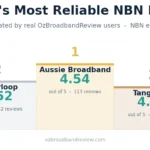
- Speeds are too slow at peak. Your provider may have under-bought their wholesale CVC capacity, so your speeds drop hard between 7pm and 11pm. Switching to a provider with better evening speeds (Aussie Broadband, Superloop, Exetel, Tangerine usually) fixes this.
- Customer support is in another country. Most cheap providers offshore their support. If you want an Australian call centre, you’re looking at Aussie Broadband, Telstra, Mate, Belong (Telstra’s discount brand) or Optus.
- You moved house. Some providers make this easier than others. Sometimes a fresh signup with a different provider is cheaper than the relocation fee.
- You’re upgrading your speed tier. A lot of people who started on NBN 25 or NBN 50 a few years back are now finding their household needs more (multiple streamers + gamers + WFH).
Whatever the reason, the switching mechanics are the same. The next sections walk you through it.
Step 1: Check your current contract
The single most important step. Two things to look for:
Exit fees
Most NBN providers in Australia don’t lock you into contracts any more, but some still do. Telstra, Optus and TPG often have 24-month contract plans with early termination fees. If you signed up on a contract plan to get a “free” modem, that modem usually has a stuck-on cost, typically $10/month for 24 months, and you have to pay out the remainder if you leave early. Read your most recent bill; the contract end date is usually printed on it.
Month-to-month plans (Aussie Broadband, Superloop, Exetel, Tangerine, Mate, Dodo and most smaller players) have no exit fees. You can leave any time.
Equipment ownership
If your old provider sent you a modem, find the fine print on whether you own it outright or are still paying it off. Three scenarios:
- Modem paid off in full — yours to keep. Pack it away or sell it.
- Modem paid monthly, contract not finished — you’ll pay out the remainder when you cancel.
- Loaner modem — they want it back. Look for the return address in the cancellation confirmation email. Don’t lose the original packaging if you can help it.
Most providers in 2026 ship a router with a prepaid return label. Some (Optus is the standard offender here) charge a “modem return fee” if it isn’t returned within a set window. Read the cancellation email carefully.
Step 2: Pick a new plan
The biggest thing you can change about your internet bill is the provider you pay it to. The NBN line into your house is the same line. It’s NBN Co’s infrastructure, and your provider is just reselling access. Two providers can charge $50/month and $90/month for the same line, the same speed, and (basically) the same service.
Here are the cheapest unlimited NBN plans live from the database right now, sorted by price. Intro pricing is shown where it applies. Pay attention to the post-intro price, that’s what you’ll actually be paying after 6 months.

|
Value
25 Mb/s
Unlimited data
|
$44.9/mth
for 6 mths,
then $69.9/mth |
Go to site |

|
Everyday
25 Mb/s
Unlimited data
|
$45/mth
for 6 mths,
then $72/mth |
Go to site |

|
Basic - nbn 12/1
12 Mb/s
Unlimited data
|
$73/mth | Go to site |

|
Value
25 Mb/s
Unlimited data
|
$78/mth | Go to site |
|
|
Basic Plus - nbn 25/10
25 Mb/s
Unlimited data
|
$79/mth | Go to site |
| Click here to view more NBN plans | |||
If you want to compare on something other than price, speed tier, customer support country, evening speeds, the how to compare NBN plans page walks through the framework. Or use our find a plan tool to filter on what matters to you.
Step 3: Sign up with the new provider
Online signup takes about five minutes. You’ll need:
- Your address — the provider checks this against NBN Co’s records to confirm the connection type at your premises (FTTP, FTTC, FTTN, HFC, Fixed Wireless or Sky Muster)
- ID — driver’s licence or passport. Some providers do this digitally during signup; others email you a link later.
- Payment details — credit card or direct debit. Most providers bill in advance.
- A contact number — they need somewhere to send activation notifications
- Optionally: your current provider’s account number — some new providers will handle the cancellation for you if you give them this. Most don’t, and you cancel separately in Step 5.
What you do NOT need: your current modem, current router login details, or any “transfer” code. NBN is not like mobile number porting. There’s no transfer code involved.
Step 4: The switch happens — what to expect
Once you’ve signed up, the new provider sends an activation request to NBN Co. NBN Co accepts it, schedules the switch, and notifies your old provider. You don’t usually have to do anything. NBN Co does the actual flip on the back end.
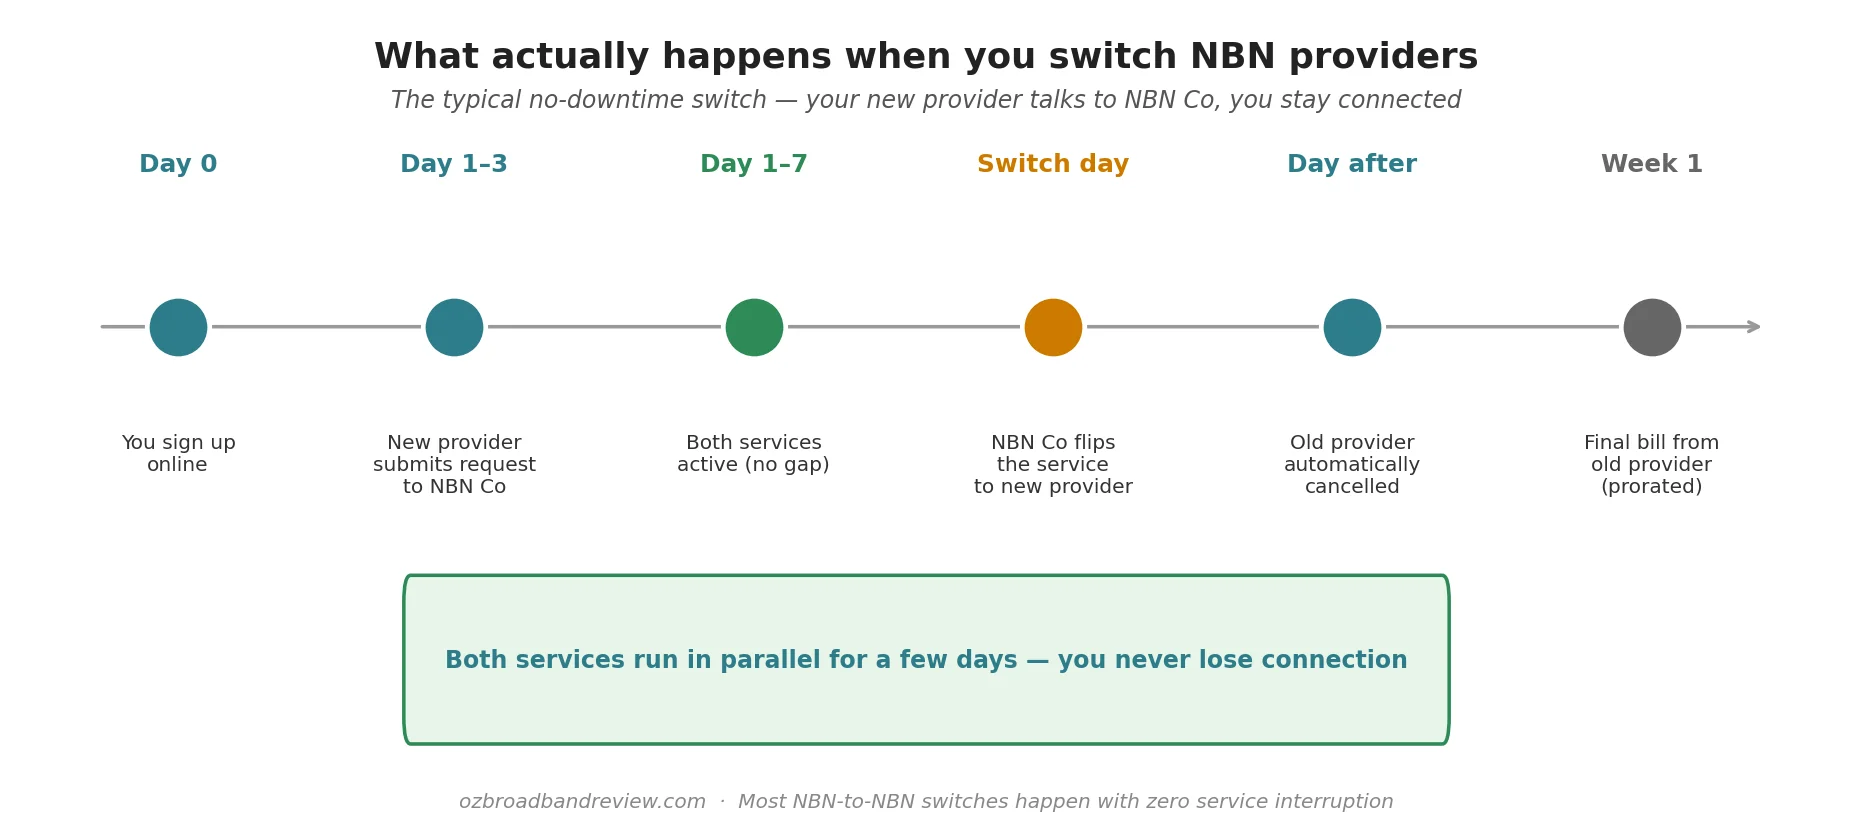
How long the back-end change takes depends on a few things: how busy NBN Co’s batch is that day, whether your old provider is cooperative (most are, by law), and what NBN type you have. The good news: in almost every case, you don’t notice anything. Both services stay active until the new one is fully provisioned, and then NBN Co flips you over.
The one detail that matters: if you’re staying on the same NBN type (almost everyone does. Your physical line doesn’t change), the modem you’ve been using should keep working. The only reason it might not is if your old provider locked it to their network. Telstra and Optus sometimes do this with the modems they bundle. If your modem is BYO, no problem.
Step 5: Cancel the old service
Two scenarios here. In most cases (NBN to NBN, same address), NBN Co notifies your old provider automatically and they close your account at the end of the current billing period. You’ll get a final prorated bill within a week or two.
Some providers, Telstra, Optus, and most of the bundled with phone ones, won’t auto-close. You need to call or use their chat to cancel. When you do:
- Be ready for the retention department offering you a discount. Decide before the call whether you’d switch back for X dollars off. Mostly the answer is no.
- Ask for a cancellation reference number in writing. Most reputable providers will email you one within 24 hours.
- Confirm in writing the final bill date and any modem return requirements.
- If they tell you there’s an exit fee, ask them to itemise it. If it’s a “modem cost” and you’ve already paid out the contract term, push back.
If you’re moving to a different NBN type or a different address, the cancellation usually has to be done separately because NBN Co doesn’t auto-link the two services. New provider handles the new address; you cancel the old one yourself.
Step 6: Set up the new modem (if needed)
If your new plan came with a modem, the provider ships it before the switch date. Wait until you get the SMS or email that says the service is active, then plug it in. Most modern modems auto-configure. The provider has pre-set the PPPoE/DHCP credentials inside, and you just plug the cable from the NBN box into the modem’s WAN port and you’re online.
If you BYO modem, you need to enter the username and password your new provider sent you. We’ve gone deep on this in BYO modem setup for NBN. The page has ISP specific quick-reference for Aussie Broadband, Telstra, Optus, TPG, iiNet, Superloop, Tangerine, Mate, Exetel, Vodafone and Dodo.
For the actual physical “plug it into the NBN box” bit, the how to connect to the NBN walkthrough covers each connection type.
Step 7: Test the new connection
Run a speed test. Compare the result to what you’d expect for your plan tier. If it’s well below the typical peak number for your tier, raise it with the new provider. They should be hitting at least 80% of the advertised speed at peak under TIO guidelines.
For the four-number explanation (download, upload, ping, jitter) and what’s normal for each NBN tier, see Internet speed tests explained.
Step 8: Review your first bill
Your first invoice from the new provider usually arrives 7–10 days after activation. Things to check:
- The monthly price matches your signup. Specifically check whether the intro discount is being applied.
- Any one-off fees — typically a setup fee ($0–$30 depending on provider) or a delivery fee for the modem ($10–$15)
- Activation prorating — most providers charge from the activation date, not the order date
- The plan name and speed tier are what you ordered
You should also see the final prorated bill from your old provider in roughly the same window. If you don’t, follow up with them. They sometimes “forget” to close out accounts, and you may end up paying for a service you no longer have.
Edge cases worth knowing about
If you’re moving house at the same time
This is the trickiest scenario. NBN Co treats “switch provider” and “move address” as two separate operations. The cleanest path is to sign up with your new provider at the new address from day one. Don’t try to transfer your existing NBN service to a new address while also switching provider. The timing gets messy.
Practical timing: sign up with the new provider at least 2 weeks before you move, with your activation date set to your move-in day. Cancel your old service for the day you move out.
If you have a business with EFTPOS, alarms or VoIP
Anything plugged into your NBN that’s mission-critical needs the new connection tested before you cancel the old one. EFTPOS machines, security cameras connected to a monitoring service, VoIP phone systems, smart locks. All need a working internet connection. Run them off the new line for 24 hours before pulling the plug on the old service. Most home users don’t need to worry about this; small businesses absolutely do.
What happens to my email address?
If you have an @bigpond.com (Telstra), @optusnet.com.au (Optus), @iinet.net.au (iiNet) or other ISP-tied email address, leaving that provider means losing the email address, eventually. Most providers give you a 30-90 day grace period, but after that the email account goes away. If you’re attached to that address, you have two options: pay to keep the email service open (some providers do this for a small fee), or migrate everything to Gmail/Outlook/iCloud first. Migrate first, it’s the universal advice.
What if I’m in a sharehouse / multi-resident household?
The account holder is the one who can switch. If your housemate is on the account, only they can authorise the switch. You can’t do it for them. Have a conversation first.
Do I need to give NBN Co notice?
No. NBN Co only deals with providers, not customers. Your new provider takes care of everything with NBN Co on your behalf. Australians don’t need to call NBN Co at any point during a switch.
If something goes wrong
Switching mostly goes smoothly, but when it doesn’t, here’s the order of escalation.
- Call the new provider first. If service hasn’t activated when expected, they’re the ones who placed the order with NBN Co. They have the order reference. Most issues are resolved at this step.
- If they blame NBN Co, ask them to escalate it. They have a back-end ticketing system with NBN Co; you don’t. Don’t let them tell you to call NBN Co directly — that’s not how it works.
- If you’re getting nowhere after 5 business days, lodge a complaint with the Telecommunications Industry Ombudsman (TIO). The TIO complaint is free and very effective. Providers tend to resolve TIO-flagged issues within 48 hours.
- If your old provider keeps billing you after the switch, demand they back-credit. Most will. If they won’t, the TIO handles billing disputes too.
Anecdotally, the worst-case scenarios we see on Whirlpool and Reddit are: an FTTN switch that took 11 days instead of 3 (regional Victoria, TIO complaint resolved it in 36 hours with a $90 credit); a Telstra-to-Aussie switch where Telstra forgot to release the line for a week (Aussie pursued it on the customer’s behalf, no TIO needed). The TIO is the answer in both cases.
Frequently asked questions
How long does it take to switch NBN providers?
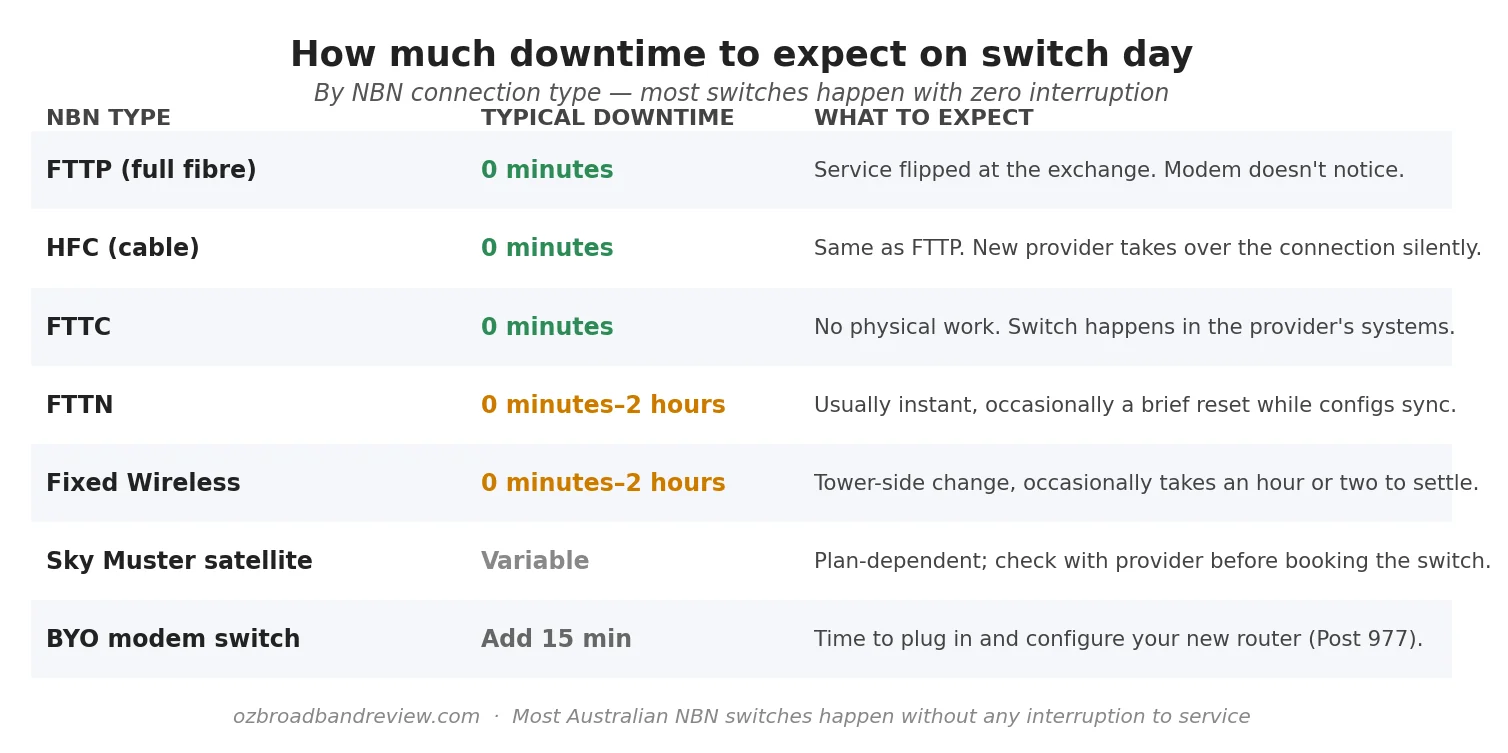
Most NBN-to-NBN switches complete in 1–7 business days from the moment you sign up. FTTP, HFC and FTTC switches are often same-day. FTTN and Fixed Wireless sometimes take a few days because NBN Co schedules them in batches. You stay connected throughout. There’s no service gap in almost all cases.
Do I have to cancel my old internet before signing up with a new provider?
No. Do the opposite. Sign up with the new provider first, wait for the new service to activate, then cancel the old one. If you cancel first, you’ll have a service gap. The new provider will tell you when it’s safe to cancel.
Do I need a new modem when I switch?
Usually no. If your current modem is generic (BYO) you can almost always use it on the new provider. You just enter their PPPoE username and password. If your old modem was provider-locked (Telstra and Optus sometimes do this), or if your new provider is sending you one in the welcome pack, swap it. Otherwise keep using what you have.
Will my speed change after switching?
Your maximum speed is set by your NBN plan tier (NBN 50 caps at 50 Mbps no matter what). The thing that changes with the provider is your evening peak speed. Providers who buy enough wholesale CVC capacity from NBN Co deliver close to their advertised peak number; ones who don’t will slow down at 7–11pm. Aussie Broadband, Superloop and a few others publish their CVC ratios; cheaper providers tend not to.
What happens to my email address?
If your email is @bigpond.com, @optusnet.com.au, @iinet.net.au or similar, it goes away 30–90 days after you cancel that provider. Migrate to Gmail, Outlook or iCloud before cancelling. Set up forwarding from the old address, give the new address to your contacts, and keep the old one running until everyone’s updated.
Are there any fees for switching NBN providers?
NBN Co doesn’t charge a switching fee. The new provider doesn’t usually charge one either, though some have a $10–$30 setup fee. Your only potential cost is from your old provider. If you’re still inside a contract term, the early termination fee applies. Month-to-month plans have nothing.
Can I switch if I’m still in a contract?
Yes, but it’ll cost you. Most 24-month NBN contracts have an early termination fee, often calculated as the monthly cost times the remaining months, plus a modem payout. Read your bill or contract for the exact number. Sometimes the savings from the new provider make it worth paying out the contract; sometimes it’s cheaper to wait. Do the maths before you switch.
Will I lose internet during the switch?
Almost never. The two services run in parallel for a few days while the back-end change rolls through, and NBN Co flips you over silently. The exceptions are FTTN and Fixed Wireless, where a brief reset of a couple of hours is occasionally needed. If continuity matters (you work from home or run a business), schedule the switch for a weekend or evening.
What’s the best NBN provider to switch to?
Depends on what matters to you. For Australian customer support: Aussie Broadband, Mate, Belong. For lowest price: Tangerine, Exetel, Dodo (intro pricing). For consistent evening speeds: Aussie Broadband, Superloop, Exetel. For bundling with a mobile plan: Telstra, Optus, TPG. The live affiliate table further up shows the cheapest unlimited plans, and our how to compare NBN plans page walks through the decision framework.
Can the new provider cancel my old one for me?
For most NBN-to-NBN switches, NBN Co handles the cancellation automatically and your old provider closes the account. Telstra and Optus are the exceptions. You usually need to call them yourself to confirm cancellation. The new provider can’t act on your behalf to cancel another provider’s contract.
What if I’m switching from non-NBN (like fixed wireless or mobile broadband) to NBN?
That’s an activation rather than a switch. You’re not migrating between NBN providers, you’re getting NBN for the first time at your address. Same signup process, but the new provider books an NBN Co technician for installation if your connection type needs one (FTTP standard install, HFC and FTTC don’t need a visit). Allow 5–10 business days for the first connection, depending on type. Cancel the old non-NBN service after the NBN line is live and tested.
Do I need to be home for the switch?
For an NBN-to-NBN provider switch at the same address: no. It’s a back-end change at NBN Co’s end. For a fresh NBN install or a connection type change (e.g. FTTN to FTTP via the free upgrade): yes, an NBN Co technician will book a visit and need access to the property.